Wednesday, March 21, 2012

Riggins Everett


Our little baby grandson has arrived!!!!!!!
7 Lbs 10 ozs  21 inches born @3:46 pm CST
Pictures to come!!!!!

Sunday, March 18, 2012

Ready to go...


No news on the grand baby yet...
but his mama has his room all ready!


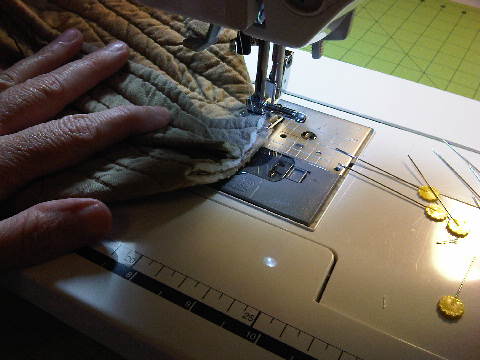
AND... I have been busy finishing up 
his little bedding. I added a skirt for the 
crib along with a set of bumper pads.
(Bumper pads...sew EASY!)


We are packing it all up today and will hopefully
head out tomorrow...the plan was to 
wait until they either called or the 
doctor induces on Wednesday...
but I am a basket case just sitting here
and my sweet man decided to
take me to see my baby before she
has her baby...

Thursday, March 15, 2012

Playing the waiting game...

This is the week....and tomorrow is supposed to be 
the day...but I don't know if it will happen...


My sweet daughter Jen and her man are awaiting the 
arrival of their first little one...

We have been sticking close to home in 
anticipation of the newest GB's arrival
since they live 8.5 hours away from us 
and we will make the drive...
 Did I mention that I am EXCITED????

Sew...I have been keeping busy with lots 
of work...and some fun items to pack
up and take with us!

This is finally the finished little quilt for 
my sweet baby grandson...


Remember this is the little quilt that I didn't have 
a pattern - I only had the picture
of a doll quilt to go by...

 I restarted this quilt and the second time 
was the charm!


That stitching was something new to me..
Didn't really know what to use.
I ended up just using embroidery thread-
all six strands doubled.


 I was a little worried when I washed it - 
I wasn't sure it would just bleed all those
glorious colors all over that brilliant white.


I threw in a couple of color catchers and it did just fine!


 I think all in all, this took about 50 hours to finish...


but it will have a lifetime of wear for my little man...


I have to say, I did become a little addicted to the hand
stitching and am excited to do more in the future!!!

My Jen wrote ever so lovingly on her twitter account
the following sincere message to her unborn son yesterday...

"Dear Riggins, I mean this with all the love in my heart:
Get Out. 
Get out get out get out get out get out
getoutgetoutgetoutgetoutgetoutgetout!"

and GiGi said 
AMEN!

Thursday, March 1, 2012

A selfish pleasure


I usually don't make anything for myself...
I don't know why, it's just that I have 
other things on my plate.
Tonight, I took a little break from 
those and decided I needed something...


 Just like the little tutorial for the Easter Basket,
I cut this out the same way.


 When I cut the corners for the squared bottom,
for this one, I cut 3 inches in and 3 inches from the bottom.
On the liner, I stitched up the sides, and about 2 inches 
in on the bottom, leaving an opening to use for later.


 The other difference is that when I put in the liner,
I attached my straps and button holder at the top
of the canvas bag, right sides together
first and stitched them using a scant 1/4 inch line.
Once I had those in place,
I slipped the liner (right sides together) over the 
outside of the bag, pinned it at the top
and stitched 1/4 inch all the way around the top.
Then I simply pulled the inside (canvas) bag out 
through the bottom and tucked the liner inside the bag,
and stitched the opening in the bottom of the liner closed.
Don't you just love that liner fabric?
and I couldn't believe I had a button that actually 
matched perfectly!!!


 Once I tucked it all inside nice and straight and snug, 
I stitched around the bottom of the bag to give it 
the permanent boxed bottom shape.
I used a canvas and it was so forgiving when 
it came to hiding the actual thread line.


Now, instead of carrying two bags to work
everyday...(a purse and a lunch box) 
I can just place it all in this one.
Win-Win!

Friday, February 24, 2012

How about a Quickie?


When my children were little, 
I always made sure they
had a little Easter Basket
 in their rooms beside their beds
on Easter morning...
 Sometimes when money was really tight,
I would have to come up with a quick,
affordable and cute idea...
This is one of them.

Keyword here...QUICK.

Sew, in that spirit...
Just go with it.
I promise it will be fun 
and you can do this within an hour.

Like I said, back in the day...
money was used for other things...
you know... 
FOOD....
so, I had to look around my house for
something to begin with....
and I had a set of these:


That's right...an ordinary quilted placemat.
It was already quilted.
TIME SAVER!!!!


Fold it in half, right sides together and sew down both sides.


At the bottom,
Cut 1 inch up and 1.5 inches from the side.
It should look like this.


 Take the corners and fold horizontally
and it forms a straight line.


 You are going to sew 1/4 in from the edge on both 
sides across that straight line.


Your placemat has a great little box shape.


It is time to turn it right side out.


 BAM!
I told you it was QUICK!


From here, you can take as much
 or as little time as you want.

You don't even have to add the lining! 
You can just fill it with the Easter grass
 you can buy at Wal-Mart for 25 cents a bag!!!


 If you do want to add a lining, then cut your fabric
the width and length of your placemat.

Go ahead and cut out your handle and fold it over 
a couple of times and then sew.


 Go back and make all the same cuts and
sew the sides like before.


 fold and sew your straight line.


 Attach your handle on both sides with a 
straight seam.


Slip your lining in.


 Fold down the top 1/4 inch and either sew
on your machine, or if you don't want a line
on the outside, just hand stitch it into place, 
covering your handles.


 I decided to decorate mine tonight...
so I simply drew out an egg
and after I added my heat bond,
I traced it on the bonding paper and cut it out.


 I did the same for my bunny.


 I stitched my bunny into place and hand stitched my eggs.


 I left enough of an edge on my bunny so I could cut 
the edges to give it a little depth.


 The tail was a little trick my mama taught me to 
make bows. I wrapped my thread around my 
fingers until I had what I thought would be
a fluffy enough tail and tied it in the center between 
the two sets of loops.


 Once it was tied, I simply cut the loops and 
fluffed out my little bunny tail.


 I attached it and tied it off.


I added the little eye, and I was done!

With all my extra steps it still only took me about
two hours!!!


 And there it was...


I hope you will give it a try...
and go ahead! USE THOSE OLD 
QUILTED PLACEMATS!

It will be your little secret!

Happy Sewing!

A few years back...3 maybe?

 A little over 3 years ago, our little quilt shop grew up. We moved to a larger space and hired more employees. So much has happened in thos...